Linear, Gamma, or Hybrid? A Guide to Skyrim SE Color Workflows
If you’re modding Skyrim SE and scratching your head over terms like linear, gamma, or hybrid, you’re not alone. These color workflows can make or break how your textures and lighting look in-game. Maybe you’ve noticed screenshots that seem too dark or overly bright and wondered what’s up. This post breaks it down: what these workflows are, how they affect Skyrim SE, and how to choose one for your mods to balance compatibility and visual quality.
How Images Are Stored and Displayed
First, let’s get the basics. Computers and our eyes don’t see light the same way. Our eyes are more sensitive to changes in dark areas than bright ones, which is why we pick up details in shadows but struggle with super bright lights. Monitors and game engines, though, follow different rules.
-
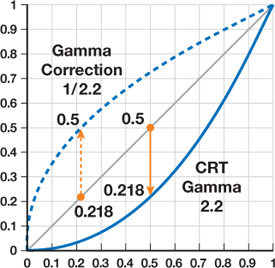
Monitors are nonlinear. A pixel set to 50% brightness doesn’t emit half the light of a 100% pixel. Instead, it follows a curve, typically with a gamma of 2.2, meaning a 50% pixel is only about a quarter as bright. This is why monitors need gamma correction to display images correctly.
-
Renderers prefer linear data. When we want to perform realistic lighting in Game engines, renderers and shader-lighting, the math works most realistic when light values add up in a linear response, two light sources should combine their brightness directly. This is a linear workflow, ideal for realistic lighting.
Gamma Response.
Most standard image formats, like PNGs or JPEGs, are gamma-encoded (often sRGB, with a gamma of about 1/2.2). This encodes the data to match human perception, make better use of the storage of the data by providing more bit-depth to the darker regions of the image and for it to look correct on our monitor standards. But if a game engine uses these gamma-encoded images for lighting calculations, the math goes wonky, because in most modern cases it will expect linear input data.
To understand how color workflows affect modding, let’s do a quick experiment in Photoshop with two versions of the same image. Grab an HDRI image, like one from Poly Haven (e.g., their carpentry shop scene), which is a 32-bit, linear HDR file. Then, convert it to an 8-bit JPEG. To do this, Photoshop switches from 32-bit to 8-bit mode, and even if you skip fancy tone-mapping options, it applies a basic clip tone map by default. This just squeezes all the image data into a 0–1 range, with no smooth falloff for highlights or shadows.
float3 ClipToneMapper(float3 x)
{
    // A custom clamp min./max. can be set
    // if you wish to adjust the white and black point.
    // return clamp(x, maxIn, maxOut);

    return saturate(x);
}
Now, load both images—the 32-bit HDR and the 8-bit JPEG—into Photoshop. At first glance, they might look identical. Why? Two reasons:
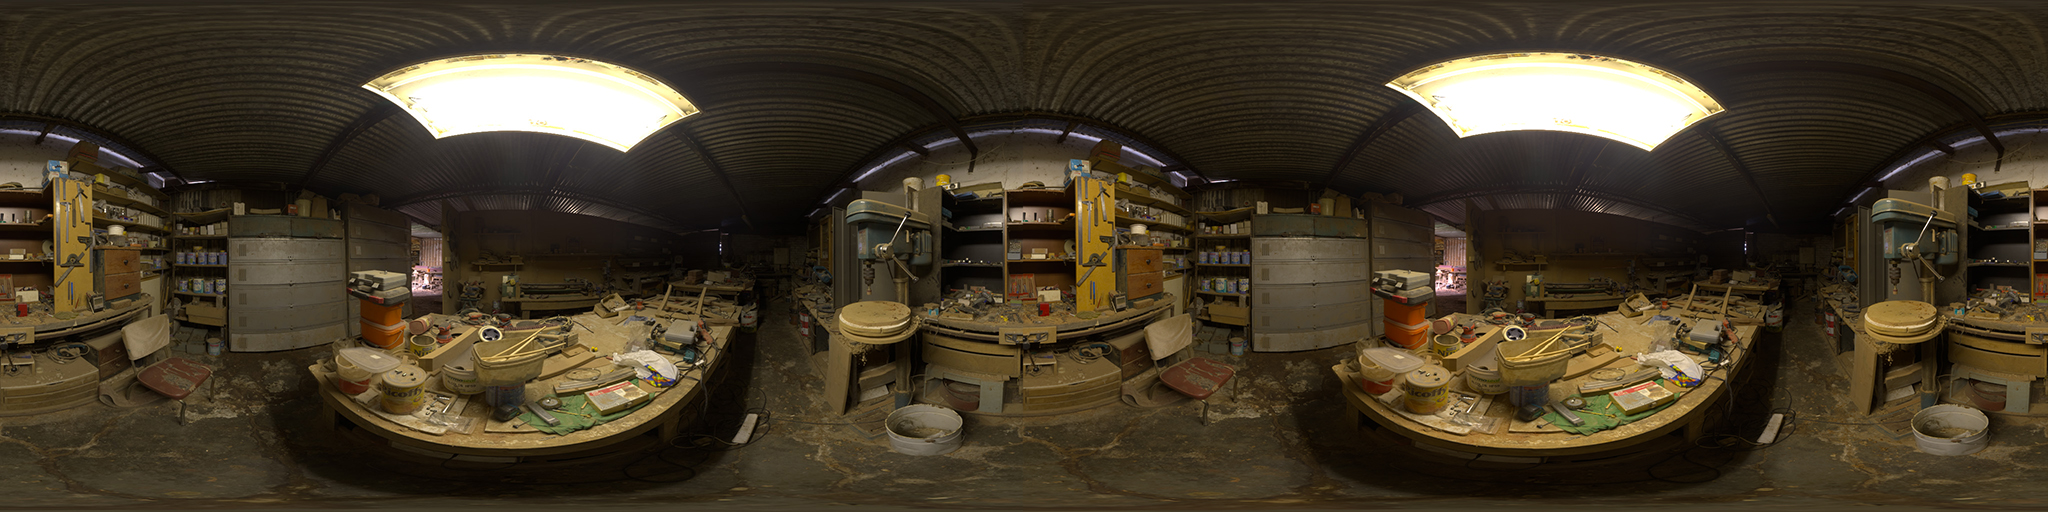
(a) is the resaved JPEG with gamma encoding and (b) is the HDR linear image.
- Photoshop’s Display Trick: The HDR image is linear, meaning its data isn’t gamma-encoded. But Photoshop automatically applies a gamma correction (like sRGB, roughly 1/2.2) to make it look good on your monitor. The JPEG, already gamma-encoded, doesn’t need this tweak, so they appear similar under default settings.
- Ideal Exposure: At the image’s default exposure, the JPEG’s clip tone mapping doesn’t show its flaws. But if you adjust the exposure up or down, the JPEG loses details in highlights or shadows, while the HDR holds up better thanks to its wider range.
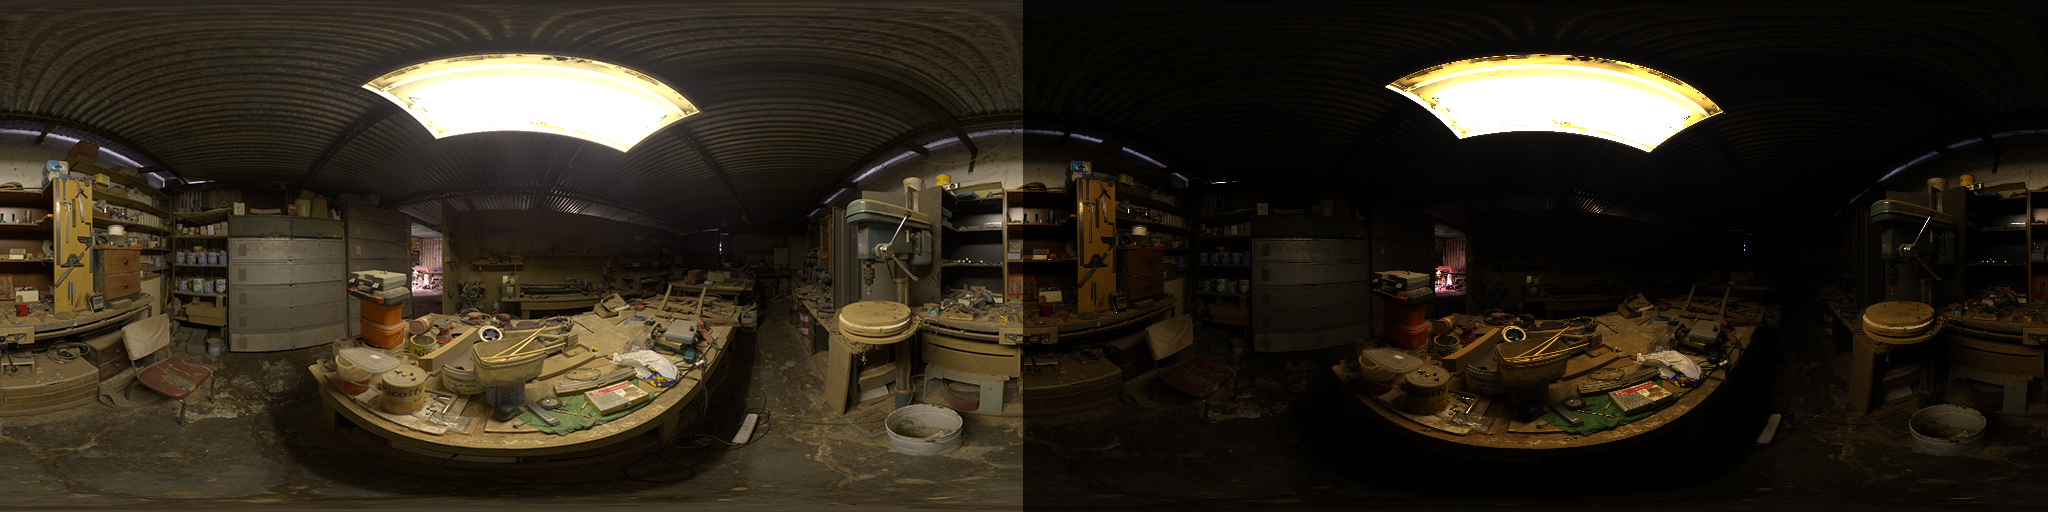
Same images as before but this time image (b) is being correctly viewed in Photoshop.
To see the raw linear data, go to View > Proof Colors in Photoshop. This turns off the gamma correction for the HDR image, making it look much darker—its true linear form, unadjusted for your monitor. The JPEG stays the same, since it’s already gamma-encoded for display. This shows why linear data is great for lighting math in games, but needs correction to look right on-screen.
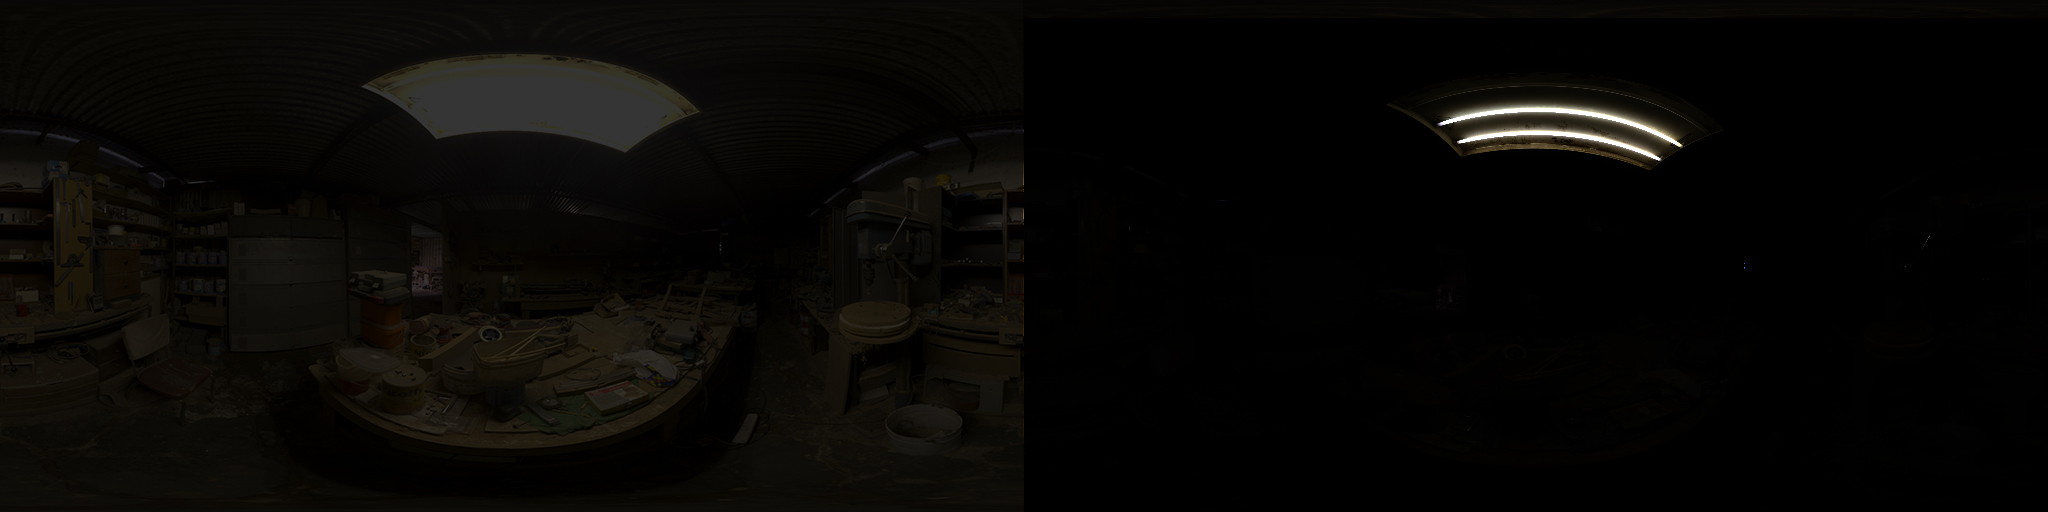
Demonstation of the loss of data in the 8-bit image (a).
Why This Matters for Skyrim SE
In Skyrim SE modding, you’re often working with DDS textures, which can be gamma-encoded (sRGB) or linear. The game’s default rendering pipeline is a gamma workflow: it takes these textures, does lighting math in gamma space (which isn’t ideal for realism), and outputs an image that your monitor corrects to look decent. Problem is, lighting math in gamma space makes shadows too harsh, highlights too bright, and effects like specular reflections or subsurface scattering (like on skin) look off.
A linear workflow fixes this by converting textures to linear space for lighting math, then applying gamma correction at the end for display. This gives smoother gradients and more realistic lighting. A hybrid workflow is a middle ground, partially linearizing textures to improve lighting while staying compatible with Skyrim’s quirks.
Linear vs. sRGB DDS Metadata
When saving DDS textures, you choose between sRGB or linear metadata. Here’s the deal:
- sRGB DDS: Tells the GPU the texture is gamma-encoded, so it hardware gamma corrects it to linear space before shading. This is great for modern GPUs but can clash with Skyrim’s default gamma workflow or some ENBSeries presets. It’s also less reliable on older systems.
- Linear DDS: Tells the hardware and/or renderer to not perform a gamma correction (usually because the source is linear, but not in most of our cases), so no conversion happens. Since Skyrim expects gamma-encoded textures by default, linear DDS aligns with the vanilla game and most mods, making it more compatible.
For modding, linear DDS is usually the better pick. It works with Skyrim’s base setup and ENBSeries, letting preset authors decide how to handle gamma correction. sRGB DDS is nice for linear workflows but risks compatibility issues with the game or other mods.
Breaking Down the Workflows
Let’s clarify the three workflows:
- Gamma Workflow: Skyrim’s default. Gamma-encoded textures are used for lighting math without correction. The monitor’s gamma response makes the output look okay, but the lighting isn’t physically accurate—shadows are too dark, and bright areas can look blown out.
- Linear Workflow: Textures are converted to linear space (via sRGB DDS or shader tweaks) before lighting math. After shading, a gamma correction (about 1/2.2) is applied for display. This workflow helps produce more realistic lighting, with better shadows, highlights, and color blending.
- Hybrid Workflow: Kitsuune has proposed to use a hybrid approach of ColPow 1.7/1.8. To try and linearise the data as much as possible, while keeping compatability in mind. A compromise. You partially linearize textures to improve lighting but don’t go full linear. This balances realism with compatibility, especially for modpacks with mixed texture quality.
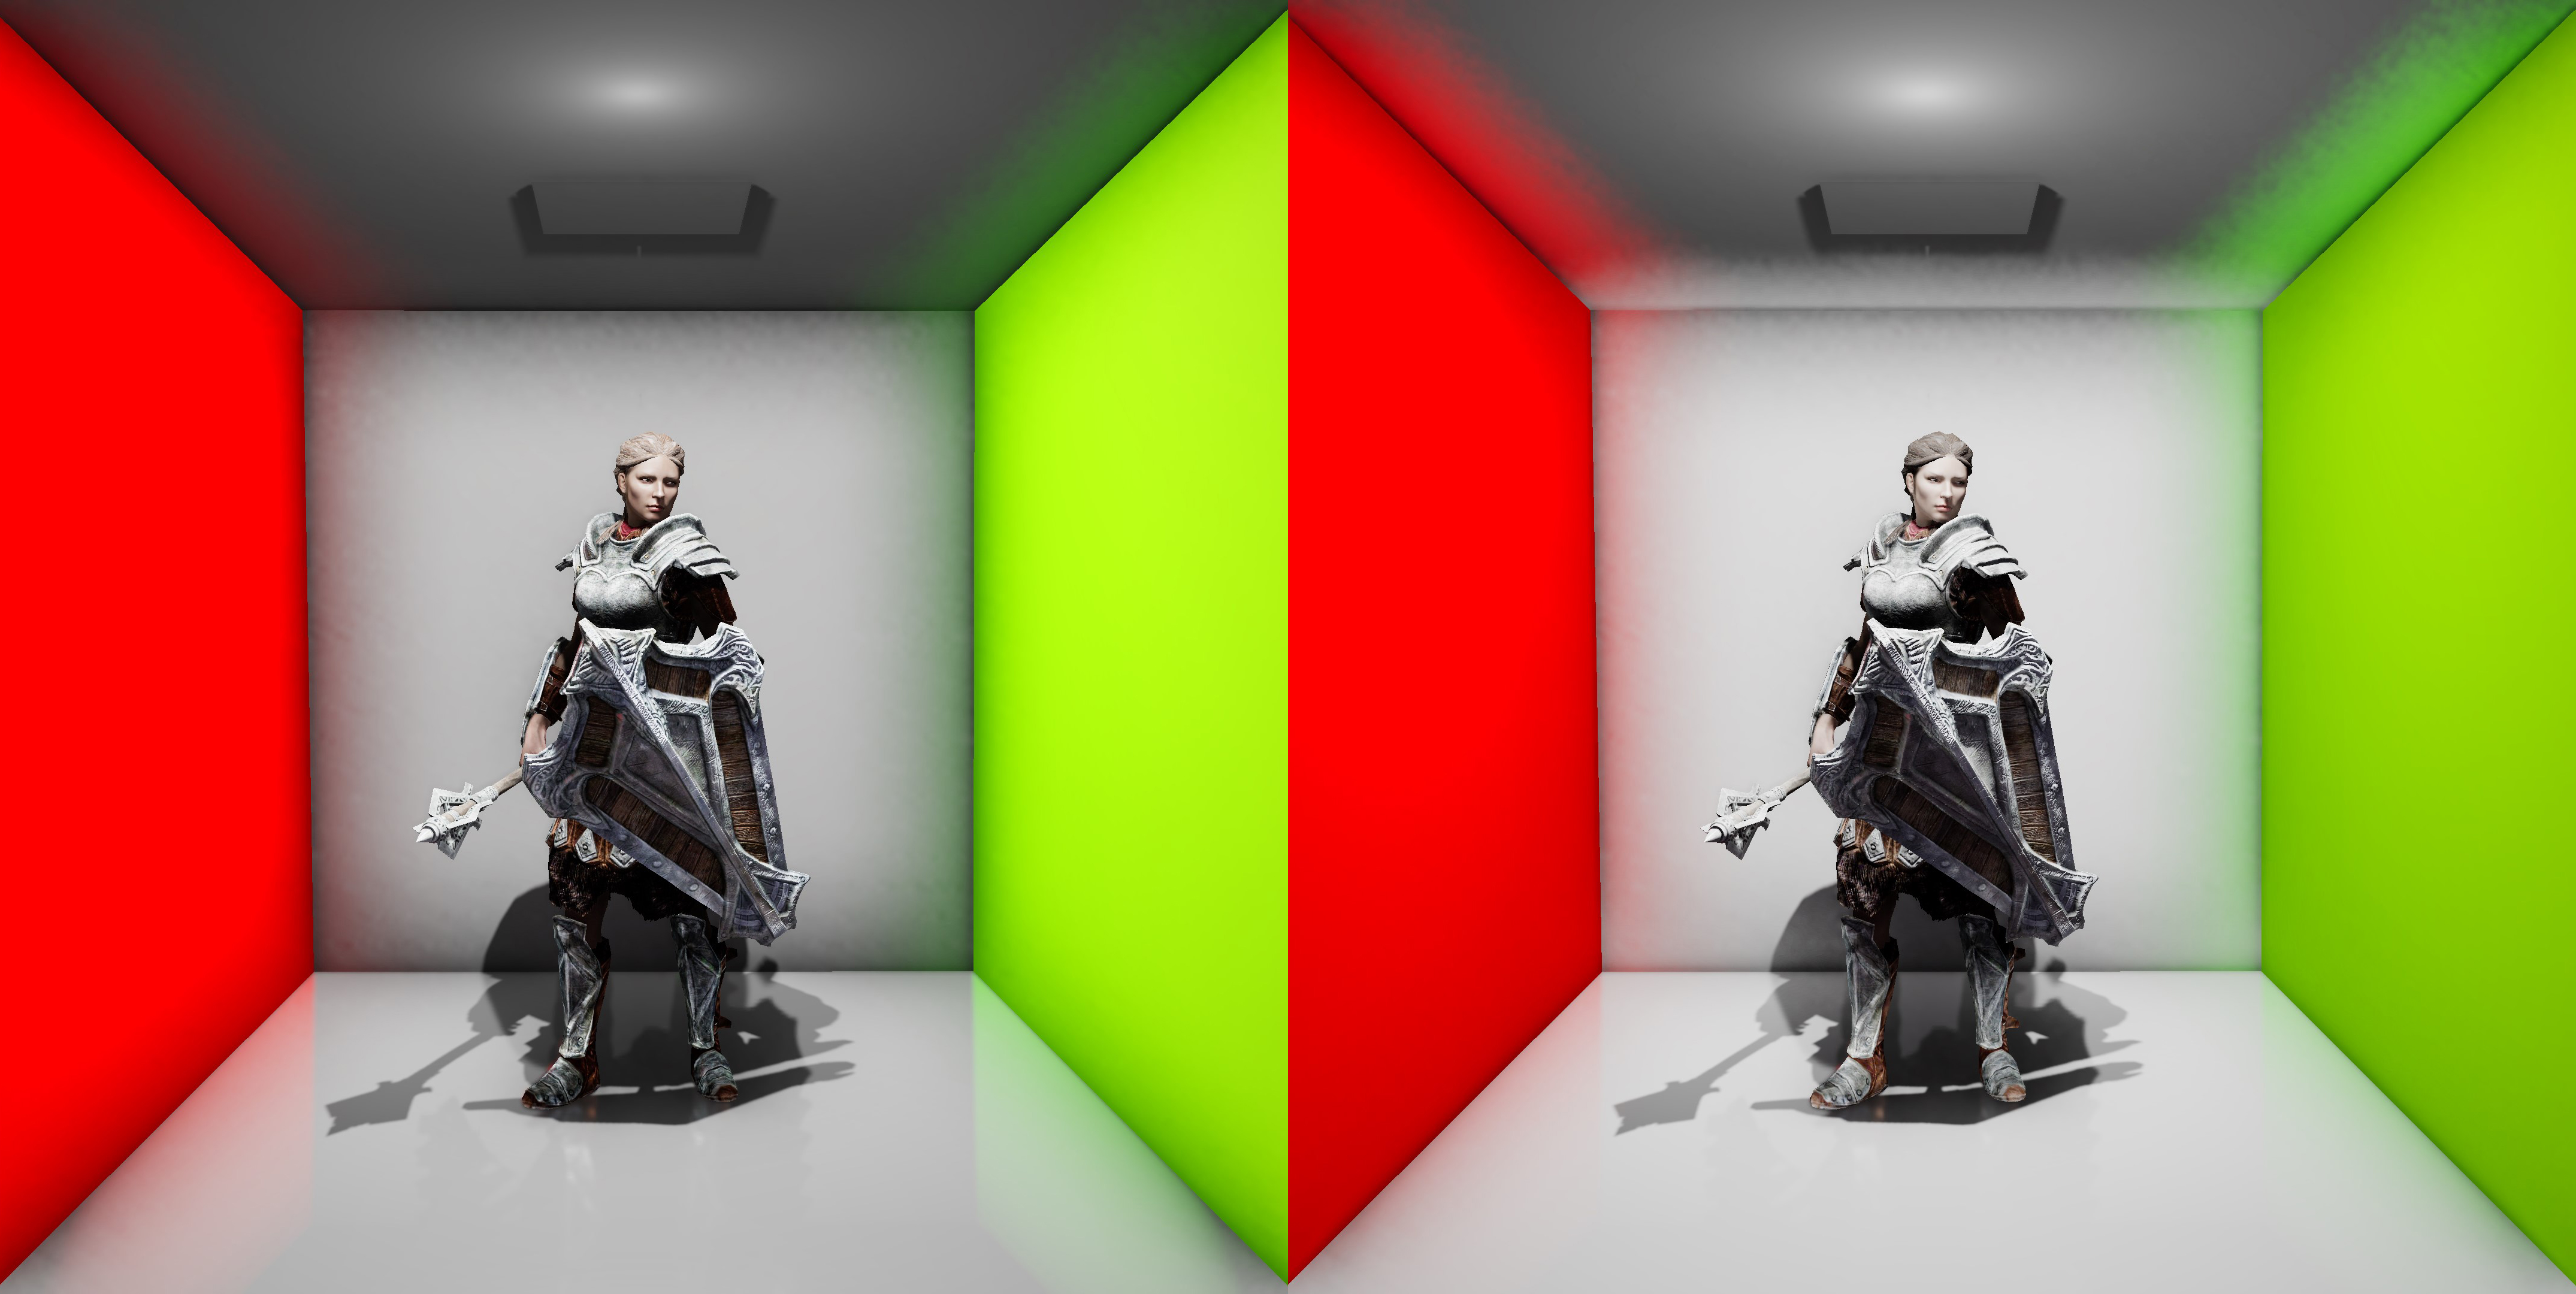
(a) Linear workflow and (b) Gamma workflow. Hybrid is going to sit somewhere in the middle depending on the ColPow value you use.
Making It Work in Skyrim SE
Skyrim’s gamma workflow isn’t great for realism, but mods like ENBSeries can help. ENBSeries has a global ColPow texture function that applies gamma correction to textures before lighting. A ColPow of 2.2 fully linearizes sRGB textures, mimicking a linear workflow. Then, you apply an inverse gamma correction in your shader pipeline (enbeffect.fx) to match your monitor.
float LinearToDisplayGamma(float x)
{
    // If you want to use the full linear workflow
    // you can gamma correct by 2.2.
    return pow(x, 1 / 2.2);
}

float ColPowLinearToDisplay(float x)
{
    // You may want to offer a GUI exposed variable to your
    // users, so that they can match the ColPow values
    return pow(x, 1 / ColPowAmount);
}
Full ColPow 2.2 help to produce the most accurate lighting and shading but can highlight flaws in modded assets—like textures saved as sRGB DDS by mistake or with baked-in effects like ambient occlusion. Mod-lists often mix textures from different authors, which can vary in quality and standards, making a full linear workflow tricky.
A hybrid workflow with ColPow 1.7 or 1.8 is often smarter. It partially linearizes textures, improving lighting without breaking compatibility. It’s forgiving for inconsistent assets and works across different setups. For projects built from scratch (like our Oculus project), ColPow 2.2 is ideal for max fidelity, but most modders will want to experiment with hybrid values.
Regarding sRGB, I believe utilizing sRGB DDS metadata would be preferable. Most gamma-encoded images are in the sRGB color space, making sRGB metadata an ideal correction, with the added benefit of providing an accurate inverse sRGB conversion at the end. Additionally, sRGB processing is likely faster due to hardware acceleration. However, due to the compatibility issues we’ve discussed and the compromises required for Skyrim, I think sticking with linear is the better choice.
Modding Tips
- Use Linear DDS For Color Maps: It’s the most compatible choice for Skyrim SE textures, working with the base game and most ENBSeries presets.
- Tweak ENBSeries: Try ColPow values between 1.5 and 2.2. Start at 1.7 and adjust based on how your textures look in-game.
- Check Your Textures: Ensure they’re not double-corrected (like sRGB DDS with a custom gamma). There are tools out there that can scan your mod-list for sRGB meta data.
- Know Your Monitor: Most monitors use a gamma of 2.2. Calibrating it helps you see colors accurately when authoring assets.
The Bottom Line
So, what’s the best workflow for Skyrim SE modding? It depends. A linear workflow (ColPow 2.2) is most ideal for realism but needs consistent, high-quality assets. For most modders, a hybrid workflow (ColPow 1.7–1.9) hits the sweet spot, improving lighting while keeping things stable across modpacks and setups.
Understanding how gamma-encoded textures interact with Skyrim’s engine is key. By choosing linear DDS and tweaking ENBSeries, you can make your mods look stunning without compatibility headaches. Play around, test your setups, and enjoy crafting those epic visuals.